| ALL ABOUT JPEGS |
 |
| Most people have heard the term "jpeg," and instantly associate it with digital images. That it is a file format identifiable by the ".jpg" extension on the end of a file name is also generally known.
But the actual reason jpegs exist, why they're used instead of a different format (tiff, pdf, or png, for instance), and the drawbacks and benefits of using one format over the other - these details can quickly become confusing.
This article covers the hows and whys of the jpeg format in detail.
|
SUMMARY
This article includes:
- A breakdown of the JPEG format
- Jpegs and digitally designed images.
- Tips and tricks for saving image files.
- A handy chart comparison of the most common image file formats
|
| WHAT IS A JPEG?
|
 |
File Compression
Jpeg stands for "Joint Photographic Experts Group." This is the organization that created the format, and something most people will never need to know. The most significant quality of a jpeg file is its compression capabilities. When a photograph or digital design is created or altered from a .tiff or .raw file format and saved as a jpeg, the new file size will be smaller. In order to decrease the file size, some information contained in the original file must be thrown out. This quality is why jpegs are classified as a "lossy" file format.
What the viewer sees next time they open the file (as a .jpg) is not quite the same as it was before (as a .tiff or .raw). In the case of photographs or "naturalistic" artwork, the alterations will be so slight, they are unlikely to be picked up by the human eye (excepting, possibly, the very discerning artist who created the work).
Where this compression begins to cause problems is in digitally designed images such as lettering, or on scans or photographs of simpler artwork like line drawings and cartoons.
The Upside
Though put this way, this compression sounds largely negative. However, there are many advantages to this space-saving quality. Photographs taken in RAW format are really big: think 14.1 MB versus 3.15 MB for a jpg of the same image). As stated above, if it is simply a matter of taking family picture to share through email, or even to print, then jpeg is the way to go.
Using this file format will not affect the dimensions of the image (4000 x 3000 pixels, or 16x22 inch print), and will make it much easier and faster to send or transfer from storage devices.
There is also plenty of software that allows the user to control just how "lossy" the compression. This affects file size, of course (less loss = larger file), but has the advantage of malleability, so the user can choose to make their photographs more, and line drawings less, compressed. Essentially, the creator/user of the image must weigh the importance of quality vs. file size for each image.
|

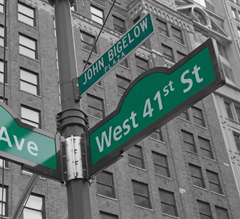
An uncompressed jpeg image - no loss

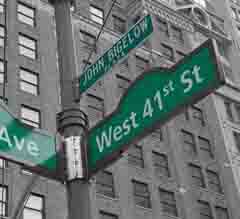
A highly compressed jpeg image - appears pixelated
|
| GRAPHIC DESIGNS
|
 |
|
When it comes to digital designs, the jpeg format can become problematic. A logo, for instance, should remain crisp when magnified. When saved as a jpeg, the edges of the image can become pixelated, or contain a lot of "noise."
There are two ways to avoid damaging the appearance of a simple, digitally made image:
- Save the original creation (from the Photoshop or Illustrator file) as a .png or .pdf file. Saving as a .tiff allows altering of the image without noticeable quality degradation, but the file will be quite large.
- If you must save an important image as a jpeg (some file uploaders only allow certain formats), be sure to change your save settings to zero compression.
|

This digital logo is best saved as an uncompressed jpeg
|
| TIPS AND TRICKS
|
 |
- Use software like Adobe Bridge, Pixillion, or one of the many free online converters to save your images in the format you need. Many programs let you batch-convert multiple files at one time.
- If you don't know what you're going to use your photographs for, and you have a quality DSLR (digital single lens reflex) camera, consider shooting in RAW. Your images will be very large and of good quality, but you can easily convert them to jpegs if you don't end up needing that level of quality.
- If you take photos in a RAW format, it is important to note the images may appear less sharp. This is because a sharpening algorithm is used when a file is being condensed into a jpeg. When you open a RAW image in Photoshop, it will automatically make some adjustments to your image that are similar to those you would probably make yourself. You can, however, choose to open the images without alterations.
- If working with a vector graphic - a digital image created using mathematical and geometric objects like lines, curves, and points - you may choose to save it as a PDF. This will keep the image as a vector file, and preserve any fonts that may not be installed on the computer that next opens the image.
- If you know you will eventually need to save an image as a jpeg, do not do this until the very end. While editing and otherwise working on the image, save it as a tiff. Finally, when you are ready to deliver or use the image, save it as a jpeg with zero compression.
|

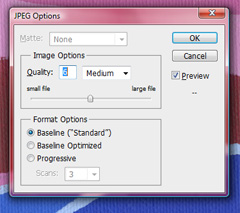
Choosing higher quality results in less information loss
|
| COMPARING IMAGE FILE FORMATS
|
 |
|
The following chart outlines the differences between the most common image file formats. The size listed is for a large image of the same dimensions for each format: 5150 x 6400 pixels.
| FORMAT |
SIZE |
INFORMATION |
USE |
| JPEG |
33.6 MB |
Ideal for online images that are ready-to-use. Some loss of quality but the small file size is useful. |
- Yes: photos being used on the internet
- No: images you will edit
|
| TIFF |
91.4 MB |
Zero compression (lossless), and allows tags, transparency, and layers within the file. |
- Yes: editing and storing images
- No: online images
|
| BMP |
91.3 MB |
This file format is no longer used. Images should be saved as .tiff, .gif, or .jpgs. |
N/A |
| RAW |
N/A |
Only applies to images taken with a digital camera |
- Yes: shooting photographs
- No: saving images
|
| GIF |
13.4 MB |
Mostly used for internet graphics. Lossless but only for small, simple images. |
- Yes: small graphics, few colors
- No: photographs
|
| PNG |
51 MB |
Developed as a GIF alternative. Unlike GIF, supports transparency in files (similar to layers). |
- Yes: graphics and small web files
- No: photos for wider distribution (print, edit, etc.)
|
| PDF |
150 MB |
Can be used for almost any data, from images to text documents. Ensures no changes occur due to defaults and software on different computers. |
- Yes: vector images you may edit
- No: photographs, or scans of art
|
|
|
Understanding the inner workings of file formats is not a prerequisite of using them, but a bit of basic information can make the difference between a simple editing and sharing experience, and one riddled with pixelated pictures and slow transfers.
If you are ordering prints of an image from us, and are still unsure what file format will result in the smoothest process and best outcome, please do not hesitate to contact us with your questions. Our knowledgeable staff is always happy to clear up any technical concerns and make sure you get the perfect printed image every time.
At KeenART Media, our online Upload Form accepts only JPEG files less than 16 MB in size. If you would like to submit TIFFs, large JPG files, or a different format, please place your order using a small JPEG version of the file (a thumbnail), and then submit your hi-res file(s) by one of the following
methods:
- Send them through a free online storage service like DropBox.com, Google Drive or WeTransfer.com. Be sure to share the files with orderdesk@keenartmedia.com.
- Upload the hi-res file(s) to our FTP server. (To upload your file(s) to an FTP server, you need to know how they work)
- Download FTP client software such as FileZilla (a free FTP software).
- Our FTP server details:
- Host/Server: ftp.keenarts.com
- username: cx
- password: please contact us for password
- Mail a DVD with the hi-res file(s). Please contact us for our mailing address and note: this option will delay your order.
|
|
© 2002-2025 - KeenART Media Ltd.
|
|
| |
|

