| Shipping Original Artworks |
 |
|
Whether you’re moving into a new home, or an artist having made a sale, you need to make sure your artwork arrives at its destination in the best condition possible. Follow the guidelines below to get a better idea how to protect and ship your artwork safely and securely.
|
| The Basics
|
 |
|
The steps involved in protecting your art piece will vary depending on its size, shape, medium and the limitations of your shipping company. For example, packaging a rolled photographic print will require a different method than packaging a stretched canvas original. However, the basic steps in protecting all manners of artwork are outlined below:
|
|
|
 |
1. Measure your artwork. |
Measure the length, width, and height to select an appropriately sized box, shipping tube or crate. The appropriate material for shipping will vary from courier to courier.
|
 |
2. Protect & Preserve it. |
Wrapping your artwork will protect it from debris, stains, or molecular reactions in the medium, and preserve its chemical integrity as much as possible. For this reason, any material that comes into contact with the surface of your artwork should be archival quality. We also recommend that you avoid touching the painting’s surface with your bare hands; instead, wear white cotton gloves or handle the piece with acid-free tissue paper.
|
 |
3. Cushion it. |
In addition to preserving the integrity of your art piece as much as possible, you will also want to protect it from physical damage. Padding your art piece with styrofoam corners, fabric, or bubble wrap will help keep protect it against dents, crushes or creases during handling.
|
 |
4. Place it in or Create a Strong Outer Shell. |
As tempting as it would be, do not re-use old boxes when shipping artworks. Ship your pieces in new, double-walled corrugated boxes that have been ideally cut to size in order to best protect your pieces. If your artwork can be rolled, make sure you select a thick and strong enough tube that can withstand pressure or impact. Your cushioning in Step 3 should help keep its integrity from the inside-out.
|
|
| Some Shipping Do’s & Don’ts
|
 |
|
| Do’s |
Don’ts |
| Wear white cotton gloves to prevent unwanted fingerprints or dirt from getting on the artwork. |
Use any packaging materials that contain acid. Make a special note to use cardboard boxes, boards, or other packaging materials that contain acid-free substances. Certain acids could drastically change the valuable object.
|
| Line the box or crate with insulation paper, polyethylene, or bubble wrap. This will create a moisture and thermal barrier to protect it against humidity and temperature changes. |
When securing a box or crate, never use nails or staples. The vibrations can cause serious damage to the item. Instead, try using screws or heavy-duty boxing tape.
|
| Label the contents of each box or package to reduce confusion or the possibility of the valuable getting lost during transportation. Also, all boxes with fragile items should be marked accordingly. |
Avoid working in a cluttered, dirty environment like a basement or attic. A clean, isolated packaging area will prevent dirt or dust from entering the package and affecting the valuable’s condition.
|
| Double-back your flat items with materials as strong as possible. For example, canvas prints can be vulnerable to piercing during transport. After wrapping your canvas in bubblewrap, try sandwiching it between two sheet of rigid material such as sintra or gatorobard, before packaging it in a box. Such hard sheets will prevent any accidental elbows, corners or any other sharp edges piercing through the largest surface area of the box. |
When packaging framed art or photographs, don’t allow the packaging tape to touch the frame or artwork. This could damage them.
|
| Packaging Stretched or Framed Canvas
|
 |
|
If you are planning to ship a stretched or framed canvas, a newly built, double-walled corrugated cardboard box will minimize movement and offer adequate space for padding. To create this box and accomodate for cushioning, add 2”-6” to the length, width, and height of your artwork.
You can cushion your art piece with various material, such as fabric, foam, bubble wrap, etc. Since stretched canvases usually have a hollow back, make sure this area is especially well padded, ideally with fabric. Don’t overpack it to the point of the canvas bulging on the other side, which will stretch the fibres as well as the frame.
It is also recommended to wrap your canvas in some kind of plastic to keep debris from rubbing against the surface of the art. You can use cling-film, wax paper or the flat side of a sheet of bubble wrap. For an extra-protective touch, you can also use Glassine, which is a sheet of smooth, glossy acid-free paper that is air, water, and grease resistant. (When using Glassine, only use artist tape to adhere it to the back of your canvas, NOT packing tape!)
Once the front and back of your canvas is well protected, fully wrap it in bubble-wrap or a plastic bag just in case. Then, secure the corners by padding them with foam corners, or any other material that will cushion them from the edge of the box.
Place your art piece in the box and pad any remaining areas that can use extra cushioning. Cover with the lid and tape securely, several times around.
|
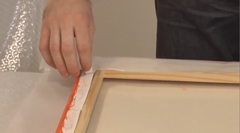
An early step of protecting a canvas for shipping.
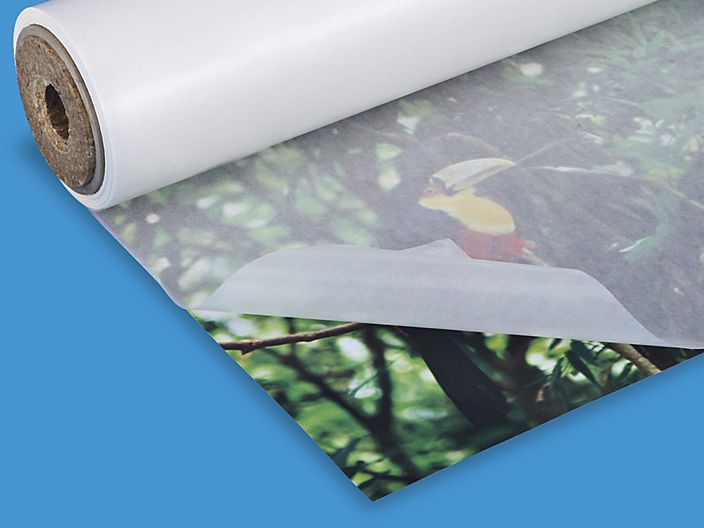
Glassine paper is clear, glossy acid-free paper that is air, water, and grease resistant.
|
| Packaging Framed Artworks with Glass or Plexiglass
|
 |
|
Shipping artwork behind glass can be an extremely complicated ordeal. Because glass is particularly susceptible to cracking during transit or upon impact, acrylic plexiglass has become a more popular choice as a replacement. Unlike glass, plexiglass is lighter, more rigid, and its chemical makeup is much more reinforced, making it less brittle and more resistant to cracking.
That being said, packaging artwork with either glass or plexi-glass still requires great care and thorough, deliberate packing. Most couriers are wary to ship glass at all and may even refuse it. If you are able to find a courier who will, here are some tips below to help you prepare your artwork accordingly.
- Since the slightest shift in tension or disruption in handling can cause your glass to shatter, make sure you provide more than ample padding to limit movement as much as possible. Ideally, your artwork should be so well packed that it is considered completely immobile.
- Make sure to take extra protective measures in preparing your artwork from the glass itself. This way, if the glass does break, at least your artwork will still survive. Make sure your protection ensures that the glass shards do not scratch, slash, or tear your work. If you can somehow ship your artwork separately from the glass, or at least even create a wall of material between the two (cardboard, bubble-wrap, foamboard, etc), that will help significantly.
- Another way to prevent damage done by broken glass is to apply a masking tape strips to it. Layer 4 strips of masking tape into two X-shapes that overlap in the centre. This will not only help stabilize the cracks if in case the glass does snap, but it also keeps the shards intact with one another until you are ready to remove them. By applying the masking tape, the shards will remain stuck to the adhesive, and hopefully not shred your art piece as they shift inside the package.
- Alternatively you can also wrap the glass in cling-film, which will also keep the shards in place until you can dispose of them later.
If possible, we recommend shipping your piece without glass, and then purchasing plexi-glass for future use in its place.
|
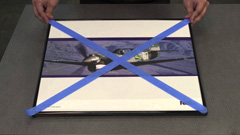
Tape glass diagonally to help keep shards intact.
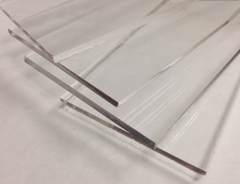
Plexiglass is less brittle and lighter than glass. If you can, replace your glass with plexiglass.
|
| Packaging Frameless, Matted Artworks
|
 |
|
Sometimes frames can discarded or or disassembled for transport (see our Metal Frames for example), but then how does one transport the matted artwork inside? Here are some of our pointers:
-
Protect the Surface Area: Wrap the painting in acid-free, archival tissue paper or Glassine. You can do this by cutting two sheets of tissue or glassine paper that is 2” wider than your matboard and folding the extra sides beneath. Make sure to use artist tape only when handling archival materials or glassine.
Protect the Corners: Take (4) 8”x8” square pieces of glassine or tissue paper (you may need to adjust this to better fit the size of your work) and fold each one diagonally in half to create a triangle, then once more to create triangle pocket. Slot one pocket over each corner of the painting.
Create a Rigid Backing: Cut 1 piece of acid-free board that is slightly larger than your piece. Adhere your artwork by taping the corners only (again, with artist tape) to this board.
Protect against Moisture: Cover what you have so far of your package with plastic sheeting / poly wrap, or inside a heavy plastic bag. Fold tightly where needed and use tape to seal all the areas in which water can seep into and cause damage.
Protect against Impact: Cut 2 sheets of foam board (or two-ply cardboard, or archival foam-board) to the same size or slightly larger than the artwork. Place the artwork between the two sheets. Having your artwork sandwiched between the two will help protect it from impact or punctures. You can seal the edges of the cardboard with either clear packing tape, cling-film, or bulldog clips.
Protect against Additional Impact: Place the foam board-covered artwork into a cardboard box with approximately three (3) inches of space on all sides. Fill the empty space with bubble wrap or wadded/shredded clean white paper to ensure that the artwork doesn’t shift during transit. Seal the box completely shut with packing tape, reinforcing the corners.
Put on the appropriate labels: To finish everyone off, adhere your shipping label to the package and put clear tape over the label to protect it from smudges or damages. Also tape on FRAGILE stickers to warn shippers to handle with care.
|
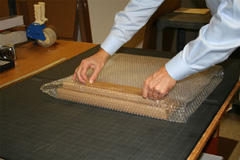
Wrap your framed print thoroughly to protect it from additional impact.
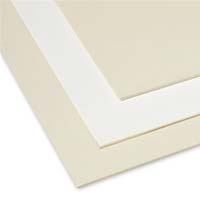
Acid-free matboards protect your artwork from chemical reactions with the cardboard.
|
| Packaging Rolled Artwork
|
 |
|
Sometimes certain art pieces can be unmounted from their frame to save space. Mediums such as photographs, watercolors, acrylics and oils can often be rolled for transport, so long as they are done so gently and with ample “looseness”. This will help prevent cracking or creasing, which occurs when pieces are rolled too tightly.
In this situation, glassine paper is highly recommended. Place your artwork atop two sheets of glassine that are at least 2 inches larger than the artwork on all four sides. Paper-based artwork (such as drawings, photographs, prints, and watercolors) should be placed face-up before rolling. Fabric-works, conversely, (such as linen or canvas) should be placed face down.
If you are shipping multiple pieces in a tube, a sheet of glassine paper should be placed in between each artwork. Layer the art from largest to smallest, and ensure that they are all facing the same direction. Keep the roll secure with a strip of artist-tape.
Make sure your shipping tube is 4-inches longer than the shortest side of your artwork. Allow for 4 to 5 inches of padding on each side of the rolleed art.
|
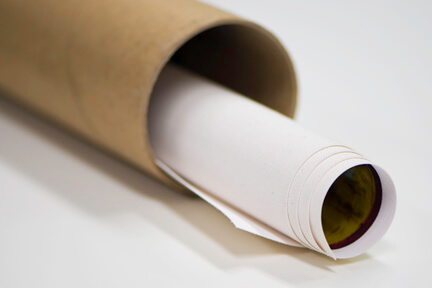
Keep rolls light and gentle so paint and surfaces do not crack or pinch.
|
| Shipping Process
|
 |
|
Depending on the size your art piece, each courier or shipping company will have varying costs and guidelines in how they handle your package. Some companies will quote a price based on the size and weight of your package, while others will price based on a term called “dimensional weight”.
Dimensional Weight refers to the volume of space that your package takes up in a truck or plane. Just as shipping companies have to take weight in account, they also have to know how much space a package need. This can be calculated using the formula for volume: L x W x H.
If your package exceeds the size or dimensional weight restrictions with your carrier company, you may need to consider having it shipped on a skid in a freight truck. A skid is a large pallet of wood usually used to carry large volumes of inventory in a cube-shape for easier tracking. Shipping an item via freight will usually take longer, and puts your artwork at more risk. Since the package will be shipped alongside other large items such as machinery, electronics, raw materials, etc, a cardboard box will not be enough: it should also be put in a crate.
Getting A Quote
You'll need all the following info to be able to get a quote from most companies:
- Overall dimensions of crate in inches (h x l x w)
- Estimated weight (lbs.)
- Contents (i.e. furniture)
- Insurance value
- Pick-up and delivery addresses (business or residential)
- Fork lift of lift-gate (truck with a lift-gate costs extra)
- Your contact info and contact info for consignee (shipping to)
Most quotes are only good for 30 days, so you'll need to schedule a pick-up date before it expires. Some companies will provide a Bill of Lading (BOL) and shipping labels automatically, some don't. Have payment and a copy of the BOL ready (usually a check will do) for the driver, and make sure the crate is clearly labeled with addresses and contact info.
|
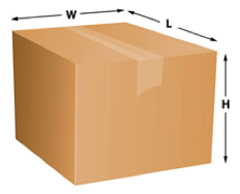
Dimension weight refers to the volume in which an object takes place on a courier.
|
|
| Building a Crate for Your Artwork
|
 |
|
|
|
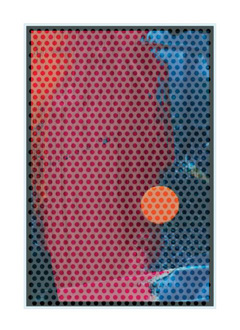 |
1. To start, measure your bubble-wrapped original artwork. These numbers will help you determine how large your wooden planks (for the outside walls of your crate) need to be. Make sure to add an extra 1-2” to all our numbers, to account for any fabric or foam-board you may use to cushion the artwork.
|
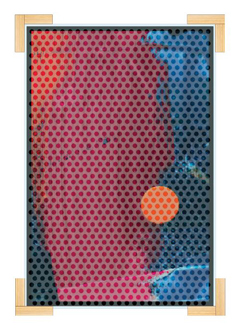 |
2. Secure your corners with corner protectors. They can be purchased in styrofoam form, or you can also make your own by nailing two short wooden planks together. If you are doing the latter, make sure you add a little bit of foam in between the wood and the artwork, to prevent splinters from piercing the bubble wrap and rubbing against the artwork.
|
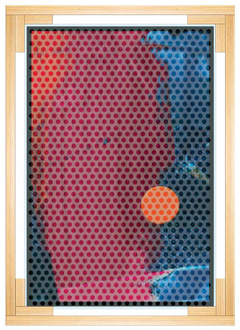 |
3. Build your frame around the final measurements that includes your artwork and the corner protectors.
|
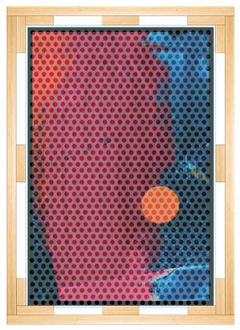 |
4. Reinforce the frame walls with additional blocks to prevent the wood from snapping if something were to hit it on the side.
|
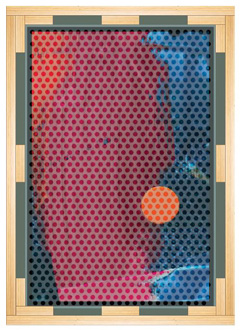 |
5. Cushion and fill all gaps with foam or fabric.
|
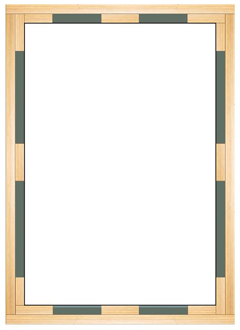 |
6. Add a layer of foam-board on the front and on the back of the artwork to act as an additional barrier (to prevent piercing).
|
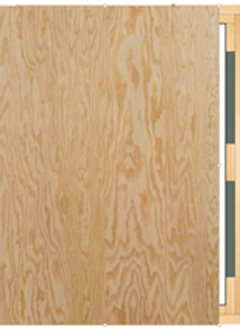 |
7. Slide the plywood sheets on the front and back.
|
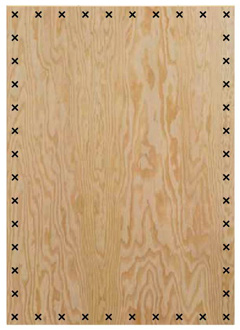 |
8. Screw sheets in place. Note: do not use nails as the impact of the hammer can shock and damage the artpiece.
|
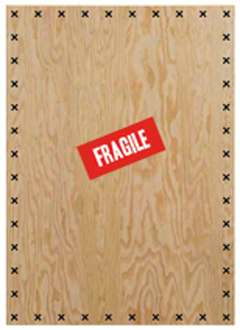 |
9. Stick on all necessary labels and waybills.
|
| You maybe interested in reading our other article: MAKING CUSTOM SHIPPING BOXES |
| Insurance
|
 |
|
Commonly used shipping companies include UPS, DHL, FedEx. Each company offers their own version of insurance at varying levels. For UPS and Fedex, they have limited insurance limits on art in transit, often just $500. If you’re considering one of these carriers, determine in advance if they’ll cover a claim for the value at which you insure the package. Pay close attention to the bill of lading and understanding the fine print. The standard form limits the exposure of a claim on the art to weight, not value.
There are also independent companies that offer insurance separately and specifically for art-transportation. Research your local insurance companies near by to see if they offer similar packages or services.
While it is always recommended to purchase insurance, the amount that is paid may not always be enough to fully cover the time, materials, and effort that spent in creating your art piece. As such, always ensure that your artworks are packed as strongly and securely as possible.
|
| Local vs. International Shipping
|
 |
|
| Local Shipping |
International Shipping |
| If you are shipping to an address within the city, it may also be more beneficial to look into local courier services, rather than big-name shipping companies. |
Shipping art internationally is a more complicated process than shipping within the country.
|
| Although courier services do not often offer insurance, they also typically deliver within the day or on the next day, which minimizes the number of persons who would handle your package, and the risks associated with it. |
The biggest difference from national or local shipping is the amount of paperwork involved for your package to clear customs.
|
| You also have more of a chance to personally stress the care the driver would have to take, and if the package does need to be left in the facility, it’s only for one night. |
Depending on your package’s destination and the company you are shipping with, your custom paperwork package can vary.
|
| Although courier companies tend to be pricier, it offers your client that little more quality and security, as well as the quicker gratification once received. |
However, for any international shipping, you must always include a commercial invoice.
|
|
| Shipping Internationally
|
 |
|
A commercial invoice should have:
- The Date
- Commercial product name, description and value of the artwork
- Detailed information of the artwork: weight, size, medium, etc
- Your business number (if applicable)
- The co-signee’s (or recipient’s) contact information: name, address, phone, email, etc
- (optionally) a photo of the artwork
- Declaration / country of origin
Below are some couriers who will ship internationally. While some will only ship between Canada and the United States, others will ship overseas as well.
- UPS
- DHL
- Fedex
- NavisPack and Ship
- Museumpros
- Armstrong Fine Arts
- Pacart
For further recommendations on art shipping companies that service overseas, contact your local municipal art gallery for recommendations or ideas. Since art dealers typically ship to clients worldwide, they would be able to shed some insights of their experience with different freight companies.
|


|
|
An original piece of art is exactly that - one of a kind, unique, and special. Thoroughly packaging and preparing your piece for transport may seem like a headache, but well worth the effort to ensure that your artwork travels safely. To help with the packaging process, KeenArt offers several materials that may be needed, such as:
|
|
© 2002-2025 - KeenART Media Ltd.
|
|
| |
| |

